.png?height=120&name=MicrosoftTeams-image%20(6).png)
One of the most recurrent messages sent to the families are authorizations. Authorizations for students to attend events, go to school trips or to confirm requested information. You can do this with Additio in Forms and authorizations section. You can attach files, create new questions to the families and require signature of the files too.
Create an authorization or form:
To create a new authorization or form you only need to access the main menu of Additio Centers and click on Forms and authorizations. Then press the blue + button at the botton right corner of the screen.


First of all you need to fill all the information required. You can omit any field you do not want to fill, it is optional.
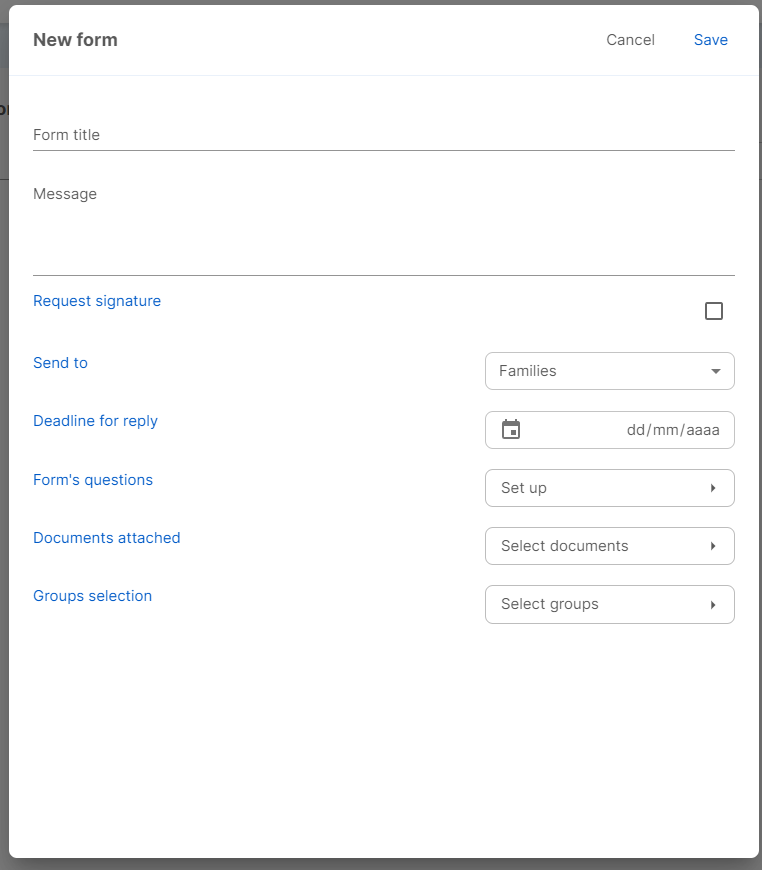
To create the questions for this form click on Set up on Form's questions, after press the + button to add each question you want to include in the form and select the type of answer.


You can attach files too.

Once all the information is completed, select the groups and students of Edvoice you want to send it to and you can Save the form.

When you press Save you can send it to families and/or students straight away or save it to send it later.

Send authorizations or forms to families and/or students:
Once you sent the authorization, families and/or students will get a message to Edvoice to answer to the authorization.

When you click on Fill out form the family or student can answer the questions and sign the authorization.

Families and/or students can sign the authorization with the finger or with the mouse.

Once all the information is filled press Send to send the authorization completed in order the center gets the results. Families and/or students can check authorizations' answers anytime.
Analysis of the answers:
From Centers, to check families and/or students answers go to Forms and authorizations section and click on the authorization you want to check.

NOTE: You can download authorizations massively by clicking on Download form's answers. You can also download an authorization individually pressing on the arrow icon next to the name of the student. You can also view the answers if you select the sheet icon option.
Below, you can find a video with all the required steps to create and send authorizations.